Tesla Model S: Forward Junction Box - 2nd Generation (Remove and Replace)
Warning: Only technicians who have been trained in High Voltage Awareness are permitted to perform this procedure. Proper personal protective equipment (PPE) and insulating HV gloves with a minimum rating of class 00 (500V) must be worn any time a high voltage cable is handled. Refer to Tech Note TN-15-92-003, "High Voltage Awareness Care Points" for additional safety information.
This procedure only applies to vehicles with the 2nd generation High Voltage configuration. The Forward Junction Box is part of the DCDC converter for vehicles with the 1st generation High Voltage Configuration.
Removal
- Perform the vehicle electrical isolation procedure (refer to procedure).
- Remove the extension box from the underhood storage compartment (refer to procedure).
- Release the 4 harnesses from the top of the FJB.
.png)
1 HV Battery heater harness 2 DCDC converter harness 3 Compressor harness 4 PTC heater harness - Release the 12V harness from the left side of the FJB.

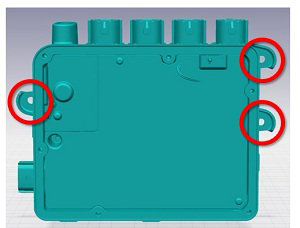
- Release the 6 bolts that secure the FJB cover (torque 7 Nm).
Remove the cover.

- Use a small, insulated screwdriver or similar tool to pry open
the cover on the front upper left of the FJB.
Warning: Do not use a metallic tool to open the cover.

- Use a multimeter to check voltages between:
- B+ to ground
- B- to ground
- B+ and B-
- Release the 2 bolts that secure the HV cables to the busbars
inside the FJB (torque 4 Nm).

- Release the clips that secure the HV cables.
Note: The O-rings on the HV cables might create suction, which makes the cables difficult to remove. It might require greater than normal force to release the cables.

- Release the 3 bolts that secure the FJB to the body (torque 10
Nm). Carefully remove the FJB.
Installation procedure is the reverse of removal.
READ NEXT:
 Forward Junction Box - 2nd Generation - 20 Amp Fuse (RWD) (Remove and
Replace)
Forward Junction Box - 2nd Generation - 20 Amp Fuse (RWD) (Remove and
Replace)
Warning: Only technicians who have been trained in High
Voltage Awareness are permitted to perform this procedure. Proper
personal protective equipment (PPE) and insulating HV gloves with a
Forward Junction Box - 2nd Generation - 40 Amp Fuse (RWD) (Remove and
Replace)
Warning: Only technicians who have been trained in High
Voltage Awareness are permitted to perform this procedure. Proper
personal protective equipment (PPE) and insulating HV gloves with a
Forward Junction Box (Dual Motor) (Remove and Replace)
Warning: Only technicians who have been trained in High
Voltage Awareness are permitted to perform this procedure. Proper
personal protective equipment (PPE) and insulating HV gloves with a
SEE MORE:
Assembly - Closeout Extension - LH - Center Console (Remove and Replace)
Removal
Remove LH wrapped panel trim (refer to procedure)
Remove mat from footwell.
Release clips (x8) and adhesive pad (x1) securing closeout
extension to console.
Caution: Take care not to damage component(s).
Caution: Replace any broken clips.
Brake Pedal (Remove and Replace)
Removal
Remove the brake light switch (refer to procedure).
Caution: The brake light switch is a one time use
component. Ensure that a new switch is used during
reinstallation.
Remove the spring clip from the clevis pin.
Depress the brake
