Tesla Model S: Trim - Center Console - Rear (Remove and Replace)
Tesla Model S (2012-2025) Service Manual / Interior trim / Trim - Center Console - Rear (Remove and Replace)
Removal
- Carefully release clips (x8) securing rear end console closing
trim to chassis.
Caution: Take care not to damage component(s).
Caution: Replace any broken clips.
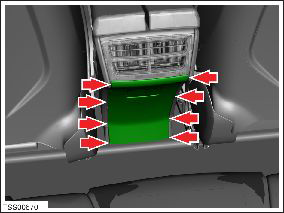
- Release center console end closing trim.
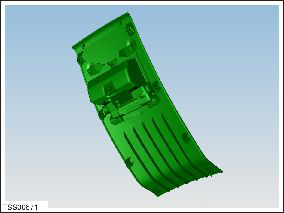
- Remove rear closing trim.
Installation procedure is the reverse of removal.
READ NEXT:
 Assembly - Panel - Wrapped - LH (Remove and Replace)
Removal
Release the clips (x10) that secure the wrapped panel trim.
Note: Components have been removed in this graphic
to aid clarity.
Vent - Center Console (Remove and Replace)
Removal
Remove center console rear closing panel (refer to procedure)
Move front center arm rests forward.
Using a suitable tool depress clips (x4) securing rear vent to
cente
Center Console Assembly (Remove and Replace)
Removal
Remove the drop in center console assembly, if installed (refer
to procedure).
Remove the under-screen cubby.
Remove the LH center console closeout extension (refer to
SEE MORE:
Brake Rotor - Rear - LH (Remove and Replace)
Warning: If the vehicle
has air suspension, activate "Jack" mode on the touchscreen before
raising and supporting the vehicle.
Special tool(s) required for this procedure:
Supplier
Part Number
Camera blocked or blinded
Clean camera or wait for it to regain visibility
One or more of the vehicle cameras is blocked or blinded due to external
conditions. When the cameras cannot
provide accurate visual information, some or all Autopilot features may be
temporarily unavailable.
Cameras can be blocked or blinded due
© 2019-2025 Copyright www.tesms.org
