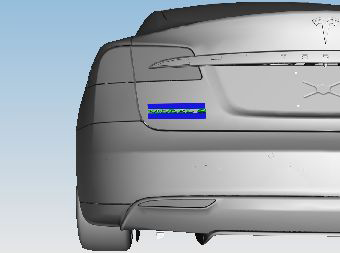
Tesla Model S: Rear Lettering (Remove and Replace)
Tesla Model S (2012-2025) Service Manual / Exterior fittings / Rear Lettering (Remove and Replace)
Special tool(s) required for this procedure:
| Supplier | Part Number | Template color | Description | Applies to |
| Tesla | 1024723-00-A | Black | MODEL S BADGE LOCATION FIXTURE | All Model S |
| Tesla | 1024725-00-A | Black | MODEL S BATTERY BADGE LOCATION FIXTURE (UPPER DESIGN) | P85+ |
| Tesla | 1065134-00-A | Light gray | MODEL S, BATTERY BADGE FIXTURE, SINGLE MOTOR | 60, 70, 85, P85 |
| Tesla | 1065135-00-A | Red | MODEL S, BATTERY BADGE FIXTURE, DUAL MOTOR | 70D, 85D, P85D, 90D, P90D |
| Tesla | 1067207-00-D | Blue | MODEL S, BATTERY BADGE FIXTURE, LUDICROUS | P85D, P90D |
Note: If retrofitting a Ludicrous Speed badge on a vehicle that already has a Performance battery badge installed., refer to procedure 12051006 (refer to procedure).
- If the fixture tools are not available, use masking tape to mark
the position of the badge.
- Using a suitable tool, carefully remove the lettering. Caution: Care must be taken to avoid damage to paintwork and exterior trim.
- Clean the affected area(s) with alcohol wipes.
- On the touchscreen, touch the Tesla logo to verify the battery size and Performance level.
- Open the liftgate to a convenient working height.
- Clean the affected area(s) of the liftgate with alcohol wipes. Note: Allow the alcohol to completely dry before continuing to the next step of this procedure.
- Place the template into position on the corner of the liftgate.
Set the badge against the corner of the template.
Tip: Use tape or a non-marring plastic clamp to hold
the template in place.
Caution: Care must be taken to avoid damage to paintwork and exterior trim.
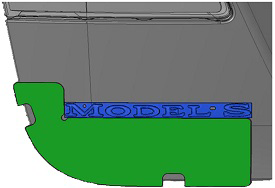
Model X template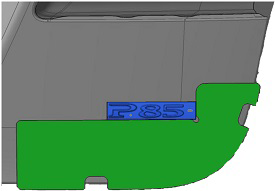
Battery template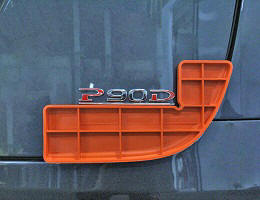
Ludicrous Speed template - Peel the backing strip off from the lettering.
- Press firmly on the badge to completely seal the badge to the liftgate.
- Remove the template
- Peel off the plastic front badge carrier from the badge.
Note: If the fixture tools are available, refer to "Installation Using Fixture Tools".
- On the touchscreen, touch the Tesla logo to verify the battery size and Performance level.
- Open the liftgate to a convenient working height.
- Clean the affected area(s) of the liftgate with alcohol wipes. Note: Allow the alcohol to completely dry before continuing to the next step of this procedure.
- Peel the backing strip off from the lettering.
- Position the lettering using the masking tape as a guide and
press firmly to ensure that the lettering is fully seated.
- Peel off the plastic front badge carrier from the badge.
- Remove the masking tape from the vehicle.
READ NEXT:
 Applique - Liftgate (Remove and Replace)
Special tool required for this procedure:
Supplier
Part Number
Description
Tesla
1049517-0
Badge - Ludicrous Speed (Retrofit)
Special tool required for this procedure:
Supplier
Part Number
Description
Bracket - License Plate - Front (Retrofit)
Special tool required for this procedure:
Supplier
Part Number
Description
SEE MORE:
Battery Care
Never allow the Battery to fully discharge. Even when
Model S is not being driven, its Battery discharges very
slowly to power the onboard electronics. The Battery
can discharge at a rate of approximately 1% per day,
though the discharge rate may vary depending on
environmental factors (such as
Mount - Front Drive Unit - LH (Remove and Replace) - Removal
Warning: If the 12V power supply is disconnected, do
not attempt to open any doors with door glass in closed position.
Failure to follow this instruction could result in door glass
shatter.
Note: Before disconnecting the 12V power supply,
ensure that the driver's door window
© 2019-2025 Copyright www.tesms.org
