Tesla Model S: Charge Port - Single Phase - Non-Motorized (Remove and Replace) - Installation
Installation
- Installation procedure is the reverse of removal, except for the following:
- If the charge port has alignment pins, use wire-cutting pliers
or a similar tool to trim them flush.

- Remove any adhesive patch residue from the mating surfaces of the high voltage cable lugs.
- If the charge port was previously installed, remove any adhesive
patch residue from the surfaces of the terminals.
- If the trim/light ring assembly was removed, re-insert it into
the body opening first.

- Connect the light ring wiring harness to the charge port, making
sure that the harness mates with an audible click. Tuck the harness
into the unused space above the trim/light ring assembly.
Caution: Make sure that the wiring harness is positioned away from the top right charge port mounting hole. If the harness interferes with the hole, it can be damaged when the mounting bolt is installed.

- Snap the charge port into the trim/light ring assembly.
- Loosely install the top left bolt to the charge port. Do not torque the bolt at this time.
- Install the remaining bolts (x3) that secure the charge port to the body.
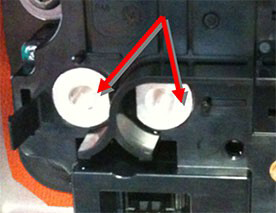
- Tigthen all 4 bolts in the sequence shown (torque 5 Nm).

- Place a paint mark on each mounting bolt to indicate that it has
been properly tightened. Use one continuous motion to mark the bolt
head, washer, and the plastic surface of the charge port.

- Pull the tab outward to remove the pawl actuator cover from the
back of the charge port.

- Push the pawl actuator tab to the left to release the pawl, then
insert the charge port alignment tool into the charge port.
Caution: A charge port alignment tool must be inserted into the charge port before attaching the high voltage cables. Otherwise, the force of the high voltage cables pulling on the backs of the pins causes the pins to become misaligned.
Note: The charge port alignment tool should only be used on vehicles manufactured for North America and Japan. Vehicles manufactured for all other countries include the European charge port and do not require use of the charge port alignment tool during this procedure.

- Move the HV cables into position. Install the ground bracket clamp.
- Tighten the lower nut that secures the charge port cable clamp
to the body (torque 6 Nm). Do not tighten the clamp nut at this
time.

- Install the bolts (x2) that secure the HV cables to the charge port (torque 9 Nm). Caution: Do not use any washers other than the captive washers that are part of the new bolts.
- Place a paint mark on each bolt to indicate that it has been
properly tightened. Use one continuous motion to mark the bolt head,
washer, and the surface of the lug.

- Adjust the high voltage cables to minimize strain on the charge
port. Tighten the cable clamp upper nut (torque 5 Nm).

- Push the pawl actuator tab to the left to release the pawl, then remove the charge port alignment tool from the charge port if used.
- Reinstall the pawl actuator cover.
- Perform a vehicle firmware update if a new charge port was installed. This ensures that the charge port's firmware is at the same revision as the vehicle firmware.
READ NEXT:
 Charge Port - Single Phase - Motorized (Remove and Replace)
Warning: Only technicians who have been trained in High
Voltage Awareness are permitted to perform this procedure. Proper
personal protective equipment (PPE) and insulating HV gloves with a
Charge Port - 3 Phase (Remove and Replace)
Note: This procedure describes how to remove and install
the 3 phase charge port. If the vehicle is equipped with a single
phase charge port, refer to procedure 44012202 (refer to procedure).
SEE MORE:
Diffuser Trim - Rear (Remove and Replace)
Removal
Remove rear diffuser (refer to procedure)
Remove plastic rivets (x2) and screw (x1) securing diffuser trim
to applique (torque 3 Nm).
Remove rear diffuser trim.
Installation
Ins
Before Using Smart Summon
Download the latest version of the Tesla mobile app
to your phone, and ensure your phone has cellular
service and GPS enabled.
Your phone must be connected to Model S and
located within approximately 213 feet (65 meters).
The vehicle's cameras must be fully calibrated (see
Drive to Calib
