Tesla Model S: Hose - HVAC - Drain (Remove and Replace)
Tesla Model S (2012-2025) Service Manual / Thermal Management / Hose - HVAC - Drain (Remove and Replace)
Removal
- Remove the LH closeout extension assembly (refer to procedure). Note: For vehicles built with the cold weather package between May 31, 2013 and July 11, 2014, a fuse box blocks access to the drain hose from the LH side. Remove the RH closeout extension assembly, then continue with the procedure by accessing the hose from the RH footwell.
- Remove the underhood storage carpet (refer to procedure).
- Remove the front underhood apron (refer to procedure).
- Remove the screws (x5) that secures the underhood storage
extension box to the underhood storage unit.
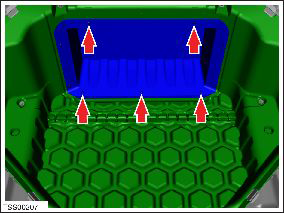
- Remove the extension box.
- From the LH footwell, place a rag under the hose to catch any remaining fluid.
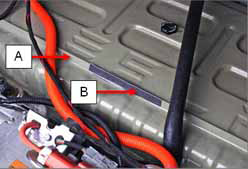
- Twist the hose to loosen and remove it from the nipple.
.png)
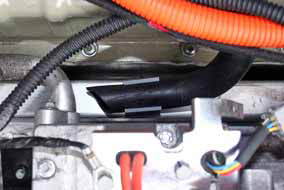
A HVAC nipple B HVAC hose - Spray silicone lubricant on the area where the hose runs through the firewall grommet.
- From the underhood area, spray silicone lubricant on the firewall grommet.
- Pull the hose out through the grommet.
- Discard the hose.
- Spray silicone lubricant onto the grommet and the tip on the
straight end of the new hose.

- Fold the straight end of the new hose into a U-shape and slide
it into the grommet from the underhood area.

- From the LH footwell, install the hose onto the HVAC nipple.
A HVAC nipple B HVAC hose - If the vehicle originally had the long drain hose that routed over the crossmember, continue to step 5. If the vehicle originally had the short drain hose that ended at the firewall, complete the steps in the Upgrade Drain Hose section before continuing to step 5.
- Push the hose into the cable clip on the crossmember until it
sits snugly in the clip.
- Reinstall the components that were removed for access.
Note: Only complete the steps in this section if upgrading the drain hose. See step 4 of the Installation section.
- Clean both sides of the cover lip on the front center of the HV battery with an alcohol wipe and allow to completely dry.
- Remove the backing from the sealing tape and fold it over the
cover lip. Use a plastic tool to smooth down the tape.
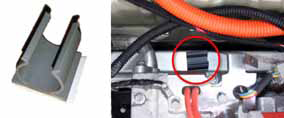
A Cover lip B Sealing tape - Clean the crossmember near the back of the A/C compressor with an alcohol wipe and allow to completely dry.
- Apply adhesion promoter to the crossmember.
- Remove the backing from the hose clip and press it firmly onto
the crossmember to secure.
READ NEXT:
 Hose - Front HVAC - Drain (Dual Motor) (Remove and Replace)
Remove
Perform the electrical isolation procedure (refer to procedure).
Remove the RH steering brace:
Remove the bolt that secures the steering brace to
Heater - PTC (Remove and Replace)
Warning: Only technicians who have been trained in High
Voltage Awareness are permitted to perform this procedure. Proper
personal protective equipment (PPE) and insulating HV gloves with a
Heater - PTC (Dual Motor) (Remove and Replace)
Warning: Only technicians who have been trained in High
Voltage Awareness are permitted to perform this procedure. Proper
personal protective equipment (PPE) and insulating HV gloves with a
SEE MORE:
Cabin Camera
Your Model S may be equipped with a cabin camera
located above the rear view mirror.
The cabin camera can determine driver inattentiveness
and provide you with audible alerts, to remind you to
keep your eyes on the road when Autopilot is engaged.
By default, images and video from the camera do
Light - Fog/Reverse - Rear - LH (Remove and Replace)
Removal
Remove the liftgate applique (refer to procedure).
Remove the tailgate lower finisher (refer to procedure).
Release the watershield for access to the fog/reverse lamp.
Note: A new watershield might be required if the
adhesive is unable to secure it in posit
© 2019-2025 Copyright www.tesms.org
