Tesla Model S: Handle - Interior Release - Door - Front - LH (Remove and Replace)
Tesla Model S (2012-2025) Service Manual / Closures / Handle - Interior Release - Door - Front - LH (Remove and Replace)
Removal
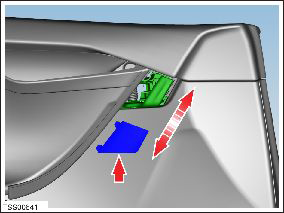
- Remove front door trim panel (refer to procedure)
- Release clips and remove door pad finisher.
Caution: Take care not to damage component(s).
- Remove screws (x3) and nut (x1) securing interior door handle to
trim pad (torque 3 Nm).
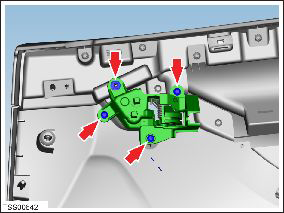
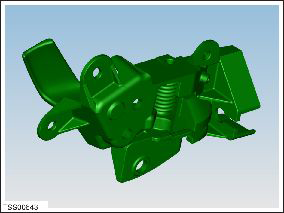
- Release and remove door handle.
Installation procedure is the reverse of removal.
READ NEXT:
 Handle - Interior Release - Door - Rear - LH (Remove and Replace)
Removal
Remove the rear door trim panel (refer to procedure).
Remove the screws (x3) and the nut (x1) that secure the interior
door handle to the trim pad (torque 3 Nm).
Handle - Exterior Release - Door - Front - LH (Remove and Replace)
Removal
Remove regulator assembly (refer to procedure)
Make sure exterior release handle is fully retracted.
Disconnect handle harness connector.
Remove nuts (x4) securing door re
Handle - Exterior Release - Door - Rear - LH (Remove and Replace)
Removal
Remove regulator assembly (refer to procedure)
Make sure exterior release handle is fully retracted.
Disconnect handle harness connector.
Remove nuts (x4) securing door re
SEE MORE:
Body Glass - Rear Quarter - LH (Remove and Replace)
Warning: To avoid personal injury, wear cut-resistant
gloves when performing this operation.
Note: Use Dow Betaseal Express or an equivalent fast-curing
glass adhesive to perform this procedure.
Removal
Remove the LH body side brightwork (refer to procedure).
Remove t
Carpet - Interior Complete (Remove and Replace)
Removal
Remove driver seat (refer to procedure)
Remove passenger seat.
Remove driver footrest (refer to procedure)
Remove LH sill panel trim (refer to procedure)
Remove RH sill panel trim.
Remove rear seat cushion (refer to procedure)
Loosen bolts (x2) securing front
© 2019-2025 Copyright www.tesms.org
