Tesla Model S: Assembly - Instrument Panel Lower - RH (Remove and Replace)
Tesla Model S (2012-2025) Service Manual / Instrument Panels and Pedals / Assembly - Instrument Panel Lower - RH (Remove and Replace)
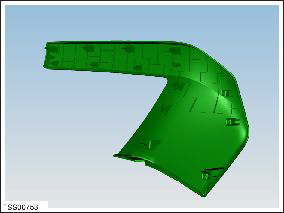
Removal
- Remove the RH instrument panel side cover assembly (refer to procedure). Note: LH panel is illustrated; RH removal is identical.
- Using a suitable tool, release the clips (x13) that secure the
trim to the dash substrate.
Caution: Take care not to damage component(s).
Caution: Replace any broken clips.

- Remove the trim from the dash assembly.
Installation procedure is the reverse of removal.
READ NEXT:
 Assembly - Instrument Panel Side Cover - LH (Remove and Replace)
Removal
Release clips (x3) securing instrument panel side cover.
Note: Components have been removed in this graphic
to aid clarity.
Panel - A Pillar Trim - Middle - LH (Remove and Replace)
Removal
Position vehicle with clear access to door assembly.
Open vehicle door.
Remove LH instrument panel side cover (refer to procedure)
Release location pins (x2).
Assembly - Finisher - Instrument Panel - RH (Remove and Replace)
Removal
Remove the glove box assembly (refer to procedure).
In the upper area behind the glove box, remove the 2 screws
(torque 10 Nm) that secure the passenger airbag to the crossbar
SEE MORE:
Assembly - Bin - Storage Center Compartment (Remove and Replace)
Removal
Remove center console carpet.
Caution: Apply contact adhesive to mating faces if
bond has been broken.
Release clips (x4) securing closing panel to dash.
Caution: Take care not to damage component(s).
Caution: Repl
Subframe Assembly - Rear (Remove and Install) -
Installation
Installation
Installation procedure is the reverse of removal,
except for the following:
Warning: Only use
cleaning agents and solvents in a well-ventilated area.
Caution: Replace all
nylon-insert locknuts.
Caution: Ensure that
© 2019-2025 Copyright www.tesms.org
